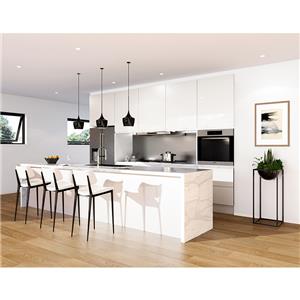
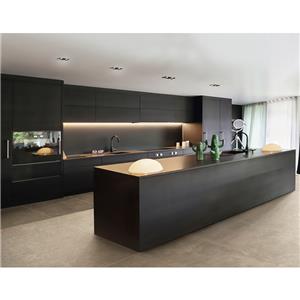
How to Make a Kitchen Island Out of Base Cabinet
Kitchen islands are a great addition to any kitchen as they provide additional workspace, storage, and seating. However, purchasing a pre-made kitchen island can be expensive. Fortunately, you can make your own kitchen island using base cabinets. In this article, we'll guide you through the process of making a kitchen island out of base cabinets.

Step 1: Plan Your Kitchen Island
Before you start building your kitchen island, you need to plan it out. Consider the size and shape of your kitchen, as well as your personal preferences. You can draw a sketch or use an online design tool to visualize the layout of your kitchen island.
Step 2: Choose Your Base Cabinets
Once you have your plan, it's time to choose your base cabinets. You can either purchase new cabinets or use existing ones that match the style and color of your kitchen. Make sure the cabinets are sturdy and durable enough to support the weight of the countertop and any appliances or fixtures you plan to install.
Step 3: Prepare the Cabinets
Remove any drawers, doors, or shelves from the cabinets. If necessary, reinforce the cabinets with additional wood supports. You can also add decorative trim to the front of the cabinets to give them a finished look.
Step 4: Install the Countertop
Once the cabinets are prepared, it's time to install the countertop. Measure the size of your cabinets and cut your countertop accordingly. You can use materials like granite, quartz, or wood for the countertop. Attach the countertop to the cabinets using adhesive and screws.
Step 5: Add Finishing Touches
You can add finishing touches to your kitchen island to make it look more polished and functional. For example, you can install a sink or a cooktop if you have the necessary plumbing and electrical connections. You can also add shelves, drawers, or cabinets to provide additional storage space.
Step 6: Secure the Kitchen Island
Once you have finished building your kitchen island, it's important to secure it in place. Attach the island to the floor using brackets or screws to prevent it from moving or tipping over.
Conclusion
Making a kitchen island out of base cabinets is a great DIY project that can save you money and add value to your home. By following these steps, you can create a beautiful and functional kitchen island that meets your specific needs and style. Remember to plan your island, choose your base cabinets, prepare them, install the countertop, add finishing touches, and secure your island to the floor.
Consider the height of your kitchen island. Make sure it is comfortable to use and matches the height of your existing countertops.
If you are using multiple base cabinets, make sure they are level with each other. You can use shims or adjustable feet to adjust the height of each cabinet.
Choose a durable and waterproof material for your countertop. It should be able to withstand spills, scratches, and heat.
If you plan to install a sink or a cooktop, make sure you have the necessary plumbing and electrical connections. Consult a professional if you are unsure about the installation process.
Use a circular saw or a jigsaw to cut the countertop to the desired size and shape. Wear safety glasses and a dust mask when cutting the countertop.
If you plan to paint or stain your kitchen island, make sure you do it before installing the countertop. This will prevent any spills or drips from damaging the countertop.
Add decorative elements such as trim, molding, or corbels to give your kitchen island a unique and personalized look.
If you have limited space, consider a rolling kitchen island that can be moved around as needed.
Finally, remember to clean and maintain your kitchen island regularly to keep it looking great. Use a mild detergent and warm water to clean the cabinets and countertop. Avoid using abrasive cleaners or scrubbers that can damage the surface.
FAQs:
1.Here are the general steps to make a simple kitchen island:
Measure the space where you want to place the kitchen island, and decide on the size and shape of the island.
Purchase base cabinets that fit the size of your island. You can use old cabinets that you have or buy new ones.
Place the cabinets on the floor where you want the island to be. Make sure they are level and secure them together with screws.
Cut a piece of countertop to fit the top of the cabinets. You can use a variety of materials such as wood, granite, or laminate.
Attach the countertop to the cabinets with adhesive or screws.
Add finishing touches, such as trim, paint, or hardware.Keep in mind that there are many variations to making a kitchen island, and you can customize the design to fit your specific needs and style preferences.
2.Can you make a kitchen island from wall cabinets?
Yes, it is possible to make a kitchen island from wall cabinets. Here are the general steps to do so:
Measure the space where you want to place the kitchen island, and decide on the size and shape of the island.
Purchase wall cabinets that fit the size of your island. You can use old cabinets that you have or buy new ones.
Build a frame for the island base using wood or other materials, and secure it to the floor.
Place the wall cabinets on top of the frame, and secure them to the frame with screws.
Cut a piece of countertop to fit the top of the cabinets. You can use a variety of materials such as wood, granite, or laminate.
Attach the countertop to the cabinets with adhesive or screws.
Add finishing touches, such as trim, paint, or hardware.It's important to note that wall cabinets may not be as sturdy as base cabinets since they are designed to be hung on the wall, so additional support may be needed for the island base. Also, be sure to check the weight capacity of your wall cabinets and make sure that they can support the weight of the countertop and any items that will be placed on it.


